Filler for plaster boards is essential for creating a smooth, flawless surface before painting or finishing. This guide provides detailed information on selecting, applying, and maintaining fillers for plaster boards. Proper use ensures high-quality finishes and extends the life of plasterboard installations.
1. Understanding Plaster Board Fillers
Plaster board fillers are compounds used to repair and smooth plasterboard surfaces, filling gaps, cracks, and imperfections effectively.
1.1 What Is Plaster Board Filler?
Plaster board filler is a material used to patch and smooth out plasterboard surfaces, ensuring an even base for painting or finishing.
1.2 Types of Plaster Board Fillers
Various types of fillers are available, including joint compound, spackle, and plaster-based products, each suited for specific applications.
2. Types of Fillers for Plaster Boards
Choosing the right filler depends on the nature of the repair and the type of plasterboard surface being worked on.
2.1 Joint Compound
Joint compound, also known as drywall mud, is ideal for filling seams and joints in plasterboard, offering smooth and even coverage.
2.2 Spackle
Spackle is a quick-drying filler used for small cracks and holes, providing a smooth surface that is easy to sand.
2.3 Plaster-Based Fillers
Plaster-based fillers are suitable for larger repairs and create a durable, hard finish, ideal for extensive plasterboard surface work.
2.4 Ready-Mixed Fillers
Ready-mixed fillers are convenient for quick repairs and minor surface imperfections, eliminating the need for mixing and preparation.
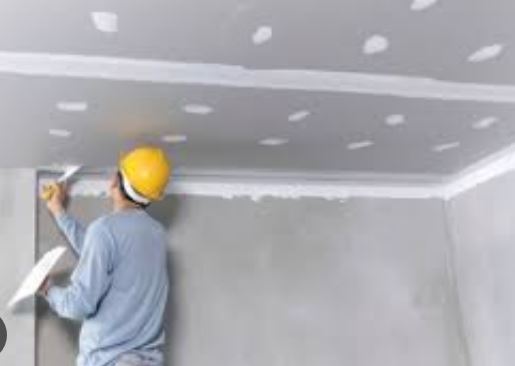
3. Applications of Plaster Board Fillers
Effective application of plaster board fillers ensures a smooth and seamless finish, preparing the surface for painting or further treatment.
3.1 Filling Seams and Joints
Use plaster board filler to fill seams and joints between plasterboard sheets, creating a uniform surface for painting or wallpapering.
3.2 Repairing Cracks and Holes
For cracks and holes, apply filler to fill the gaps, ensuring a smooth and even surface once dried and sanded.
3.3 Smoothing Uneven Surfaces
Plaster board fillers help in smoothing out uneven surfaces and imperfections, ensuring a flawless finish across the entire plasterboard.
3.4 Preparing for Finishing
Properly applied filler prepares the plasterboard surface for painting, wallpapering, or other finishes, ensuring an even and professional appearance.
4. Benefits of Using Plaster Board Fillers
Using the right plaster board fillers offers numerous benefits, including improved aesthetics, durability, and ease of application.
4.1 Enhanced Aesthetic Appeal
Fillers improve the appearance of plasterboard surfaces by eliminating imperfections, creating a smooth, professional finish that enhances overall aesthetics.
4.2 Improved Surface Durability
Proper use of fillers increases the durability of plasterboard surfaces, reducing the likelihood of future cracking or damage.
4.3 Ease of Application
Fillers are designed to be easy to apply, ensuring that even novice DIYers can achieve a smooth, professional-looking finish.
4.4 Cost-Effective Repairs
Using fillers for plasterboards is a cost-effective way to repair and enhance surfaces, avoiding the need for more expensive replacements or treatments.
5. Best Practices for Applying Plaster Board Fillers
Following best practices ensures that plaster board fillers are applied correctly, achieving the best possible results and a smooth finish.
5.1 Surface Preparation
Prepare the surface by cleaning and sanding it to remove loose material, dust, and debris before applying the filler for better adhesion.
5.2 Application Techniques
Apply the filler evenly using a putty knife or trowel, pressing it into cracks and holes and smoothing it to match the plasterboard surface.
5.3 Drying and Curing
Allow the filler to dry and cure according to the manufacturer’s instructions, ensuring it is fully set before sanding or painting.
5.4 Sanding and Smoothing
Once dry, sand the filler lightly to achieve a smooth, even surface, blending the filled areas seamlessly with the surrounding plasterboard.
6. Common Issues and Solutions
Addressing common issues with plaster board fillers can help achieve better results and prevent potential problems during and after application.
6.1 Cracking in Filler
Cracking can occur if the filler is applied too thickly or dries too quickly. Ensure even application and proper drying conditions.
6.2 Uneven Finish
An uneven finish may result from inconsistent application or insufficient smoothing. Use a consistent technique and sand the surface thoroughly.
6.3 Difficulty in Sanding
Difficulty in sanding filler may be due to excess moisture or improper curing. Ensure the filler is completely dry before sanding.
6.4 Adhesion Problems
Poor adhesion may be caused by a dirty or improperly prepared surface. Clean and prepare the surface thoroughly before applying filler.
7. Choosing the Right Filler for Your Needs
Selecting the appropriate filler based on your specific plaster board repair needs ensures effective results and a high-quality finish.
7.1 Assessing Repair Requirements
Determine the extent and type of repairs needed to choose a filler that matches the requirements and provides the desired finish.
7.2 Evaluating Filler Properties
Consider the properties of the filler, such as drying time, ease of sanding, and suitability for the type of plasterboard being repaired.
7.3 Consulting Professional Advice
For complex repairs or extensive work, consult with professionals to ensure you select the right filler and apply it correctly.
7.4 Considering Environmental Factors
Choose fillers with properties suited to the environment, such as moisture-resistant fillers for areas prone to high humidity or dampness.
8. Conclusion: Mastering the Use of Plaster Board Fillers
Plaster board fillers are essential for achieving smooth, flawless surfaces in plasterboard installations and repairs. By understanding the different types of fillers, their applications, and best practices, you can ensure a professional and durable finish